Just a quick update to let folks know about a few updates our special installers for Bodhi Linux on Chromebook hardware.
Acer C720 Chromebook
I've updated the special ISO image for the Acer C720 which I give instructions for installing here. Updates to the disc include fully functional suspend, automatic audio switching over HDMI, and an E17 profile that enables all the function keys on the Chromebook to work as expected:
You will note in my screen shot above that there is also a bluetooth icon on the system tray. I've opted not to include this by default because I know many won't have a need for it. If you want to use the bluetooth on your C720 simply run the command:
sudo apt-get install blueman
And then use the GUI that is installed to connect to/interact with your blue tooth devices.
Samsung ARM Chromebook
Find instructions for installing Bodhi on the Samsung ARM Chromebook here. While I was busy implementing many improvements to the Debian Wheezy based ARM file system, one of our forum members had been working on a Debian Jessie based file system. Late last month he finished it up to essentially get the hardware fully functional under a true Linux OS!
When you run our installer script you are now asked if you want to use the stable or testing release - I would highly recommend selecting the testing release at this point. It includes the same Chromebook specific profile I pictured above for the Acer as well as full OpenGLES support.
The installer script now provides detection for a previous install on the target disc and over writes it (as opposed to making the user manually remove their old install). Another new feature of the installer is support for different install targets. Simply provide the install target as the first argument for the installer script and you can easily run Bodhi on your Samsung Chromebook from a USB flash drive or SD card.
HP 14 and Lenovo X131e
Also - nothing for these guys yet, but I am hoping to pick up an HP 14 sometime this week and get Bodhi going on it. Our same team member who did all of the wonderful improvements to the Jessie filesystem for the Samsung recently picked up a Lenovo X131e and has started work on dual booting this with Bodhi. I will post updates about these when we have something substantial to share.
Wrapping Up
As always, if you run into any issues please open a support request on our user forums as opposed to posting a comment below.
First things first, this is not a tutorial for getting your audio working over your HDMI if it isn't already. This assumes you already have audio over HDMI working via PulseAudio, but currently have to manually assign the new output after attaching your HDMI cable.
TL/DR
If you are using a Debian based distro and don't care about the details of how this works, then you can simply install the .deb file I've prepared here. After that finishes installing you should be good to go - attach your HDMI cable and the system should automatically switch from playing over the speakers/headphones to piping audio over the HDMI.
The Details or How we make things work on not Debian
How this works is a combination of PulseAudio, Bash, and a little bit of udev.
First things first, we need a bash script that with switch between PulseAudio outputs for us. Save the following bit of code to /usr/bin/hdmi_sound_toggle :
#!/bin/bash# Switches between soundcards when run. All streams are moved to the new default sound-card.# $totalsc: Number of sound cards availabletotalsc=$(pacmd "list-sinks"| grep card:| wc -l)# total of sound cards: $totalscif[$totalsc-le1];then# Check whether there are actually multiple cards availableexitfi# $scindex: The Pulseaudio index of the current default sound cardscindex=$(pacmd list-sinks | awk '$1 == "*" && $2 == "index:" {print $3}')# $cards: A list of card Pulseaudio indexescards=$(pacmd list-sinks |sed's|*||'| awk '$1 == "index:" {print $2}')PICKNEXTCARD=1# Is true when the previous card is defaultcount=0# count of number of iterationsfor CARD in$cards;doif[$PICKNEXTCARD==1];then# $nextsc: The pulseaudio index of the next sound card (to be switched to)nextsc=$CARDPICKNEXTCARD=0# $nextind: The numerical index (1 to totalsc) of the next cardnextind=$countfiif[$CARD==$scindex];then# Choose the next card as defaultPICKNEXTCARD=1ficount=$((count+1))done
pacmd "set-default-sink $nextsc"# switch default sound card to next# $inputs: A list of currently playing inputsinputs=$(pacmd list-sink-inputs | awk '$1 == "index:" {print $2}')for INPUT in$inputs;do# Move all current inputs to the new default sound card
pacmd move-sink-input $INPUT$nextscdoneexit
Make our script executable with the command:
sudo chmod +x /usr/bin/hdmi_sound_toggle
Before moving on, confirm the script works as intended. While your HDMI cable is active run the command hdmi_sound_toggle and you should start hearing sound pipe out of the HDMI output.
Next, because PulseAudio is almost always run as a user level daemon, we need something that will move all users' Pulse sessions over to the new output when the HDMI is attached/detached. To do this we create the script /usr/bin/hdmi_sound_toggle_all with the contents:
#!/bin/bashfor dir in/home/*/dodir=${dir%*/}
sudo -u${dir##*/} /usr/bin/hdmi_sound_toggledone
Make this script executable as well:
sudo chmod +x /usr/bin/hdmi_sound_toggle_all
Confirm this script works as well, it needs to be run as root though, so run sudo hdmi_sound_toggle_all while your HDMI is attached - it should switch your output.
Finally, we need to create a udev rule that triggers our scripts when an HDMI cable is attached/detached. To do this we create the file /lib/udev/rules.d/hdmi_sound.rules with the contents:
Note that having the full file path in the execute part is important. So if you placed your scripts somewhere other than /usr/bin like I recommended above - adjust this part accordingly.
You should be good to go, enjoy having audio over your HDMI happen automatically like it should by default. Have any questions, feel free to post a comment below and I'll do my best to help.
A little over three weeks ago I purchased my first Acer C720 Chromebook. That is right - I liked this little guy so much I went and picked up a second copy so my wife and I could each have one.
For most of last year I kicked around a Samsung ARM Chromebook with me - so much of my discussion here will be in comparison to that device since it is still comparable price wise to the Acer C720.
Performance:
I've used dozens of different netbooks over the last few years and I must say the performance of this new Haswell based Intel chip is phenomenal. A dozen browser tabs open, Netflix streaming all while writing an article or two and the little guy doesn't skip a beat.
This thing can do some gaming as well. While it isn't going to run anything at maximum resolution, I've enjoyed the following titles at one point or another on my C720 in the last few weeks:
Left for Dead 2
DOTA 2
Killing Floor
Guild Wars
Elder Scrolls 3: Morrowind
The C720 comes with DDR3 memory in a quantity of either 2 or 4GB.
Look and Feel:
The Acer C720 has a solid plastic case, that is plenty functional. I wouldn't say it is going to win any beauty contests, but it isn't unappealing either:
The dimensions of the C720 are 11.34 x 8.03 x 0.75 inches and it weighs in slightly more than the Samsung at 2.76 pounds. I know many people who are used to only having full size laptops find netbooks a bit on the small size, but personally I find the eleven inch C720 to be the perfect middle ground between a tiny screen like a tablet and fuller size laptops.
Battery & Screen:
The Acer makes up for its slightly heavier weight with a slightly longer batter life. The C720 lasts upwards of eight hours on a full charge. Obviously the exact duration will vary depending on how hard you are hammering the processor and how bright the screen is.
The screen on the C720 is basically identical to every 11" Chromebook with its 1366x768 resolution. Honestly I hope this is one of the things we see an improvement on in the next generation of Chromebooks.
Ports/Connections:
The ports on the C720 are identical to the Samsung Chromebook:
One USB 3.0
One USB 2.0
1/8" audio out
HDMI video/audio out
SD Card Slot
One giant improvement for the C720 though is the location of all of these ports. Unlike the Samsung which crams both USB, the HDMI and the charging port all next to each other on the back of the device, the C720 has USB ports on opposite sides:
Just like the Samsung - the SD card slot on the C720 does not fully encompass an inserted device, meaning you won't want to travel with one inserted:
Version Comparison:
Something you want to be aware of when looking to pick up an Acer C720 is that there are a few different versions of this little laptop you have to choose from. I'm not going to cite any prices here because they seem to fluctuate week to week depending on where you look, but any version of this device you should be able to pick up for under 300 USD.
There are three* different "stock" versions of the Acer C720. Where they differ is the size of their internal storage and memory. The options are:
RAM
Storage
Option One
2GB
16GB
Option Two
2GB
32GB
Option Three
4GB
16GB
*There is also the C720P that has 2GB of memory, 32GB of storage and comes with a touch screen.
The most important thing to note if you do decide to pick up an Acer C720 is that the storage IS user upgradable while the RAM is NOT. That means if you pick up a C720 with 2GB of RAM and decide later you want more - you will need to upgrade the entire unit.
Upgrading the internal Storage (voids warranty):
If you are like me and think a C720 could easily become your day to day computer if it just had a bit more internal storage space then you simply need to upgrade the internal drive. You will simply need to pick up an M2 SSD such as this one on Amazon. Then you can simply follow this instructional video for changing out your SSD:
As someone who has opened up many laptops in his time - I must say that the C720 is very easy to get apart/back together.
OS/Software:
By default the C720 comes with Chrome OS preinstalled - if you are happy with that skip onto the next section.
One of the best things about the C720 though is that Acer has provided it with a version of Coreboot that is able to load into a traditional BIOS in the form of SeaBIOS. This means that if you aren't happy with just Chrome OS you can install a traditional operating system on the device fairly easily.
Honestly I don't see any reason not to put a full OS on the C720. The hardware is more than capable of handling it and installing the latest version of Google's Chrome browser does everything Chrome OS is capable of.
Final Thoughts:
No hardware is perfect and the C720 is not an exception to this rule. It is however a fantastic little PC for the price point that it comes at and I have been very pleased with it thus far. I picked up my C720 with 4GB of RAM refurbished for 190 USD directly from Acer via Amazon, then factor in the 100 USD SSD upgrade and I have a fantastically fast, mobile, PC with a good amount of storage for under 300 USD - not a bad deal.
Do you have a C720? If so what are your thoughts on the device? If you are looking to pick up a C720, but have a question about something I didn't cover above, please feel free to post a comment below asking.
The Here and Now - What is going on with Bodhi 2.x.y
In September of last year I posted a notice that the Bodhi 2.x.y update release cycle would be moving to releases three times a year. Then I went and made a liar out of myself when we didn't have a 2.5.0 release in January. For the sake of clarity I would like to let folks know that Bodhi 2.4.0 will be the last set of updated discs in our 2.x.y release cycle.
That being said - our 2.x.y software repositories will keep seeing their normal software updates through the summer of 2014. After this point the 2.x.y release will be moved into "security updates only" mode. Meaning the only changes to software in the 2.x.y repos at that point will be to patch security vulnerabilities. 2.x.y will continue getting security updates until 2017 when Ubuntu 12.04 reaches its end of life.
The Future - Plans for Bodhi 3.x.y
Our plan for major releases has always been every two years just after a new Ubuntu LTS release. This coming summer will mark our third major release - Bodhi 3.0.0. First, lets cover a few FAQs I've been getting regarding this new major release.
Q: Will you continue to support non-PAE Processors?
A: Yep. I do not currently know which kernel version we will be using on our non-PAE disc, but we will continue producing an ISO image that works on older non-PAE computers.
Q: Which version of Enlightenment will you use?
A: Unless I am able to beat E18 into a form I confident is consumable for "normal" users Bodhi 3.0.0 will continue to use the E17 desktop by default. Regardless of which desktop we ship with by default - both desktops will be easily accessible/swappable in our repositories.
Q: If you do use E18+ by default, what happens to systems that do not support compositing?
A: In case you were unaware, one of the "features" E18 brought with it is that compositing is now non-optional. We know that there are still plenty of useful computers out there that don't support this software. Because of this our non-PAE disc will always use E17. It will be the go to disc for running Bodhi on older hardware.
Q: What is the release cycle/date for Bodhi 3.0.0?
A: Because this is a major release, we will have a series of ISO image releases in order to thoroughly test this new base before we call things "stable". Right now the rough outline of release dates I have in my head looks like:
March 2nd - Alpha Release
April 27th - Beta Release
May 30th - Release Candidate
June 27th - Release Candidate 2
August 2nd - Stable Release
That being said, I stick firmly to my "its ready when its ready" ideology. Meaning that if I am not content with what our 3.0.0 release currently looks like come the end of June - I will delay in releasing it. Bodhi 2.4.0 is solid release and I am in no rush to replace it with something that isn't equally stable.
If you have any questions that I did not cover above - please feel free to post them below in the form of a comment or post them at our user forums.
Bodhi 2014 Donation Drive Updates
In case you missed it, last month I posted about a promotion to drum up donations for the Bodhi project. As you can see here our January donation totals were fantastic. I'd like to thank everyone for the support they continue to show our project - without you we wouldn't exist. Remember - you have until the end of March to show your support before we pick a winner for a Bodhi powered netbook!
I've been on kind of a Chromebook kick lately and I must say I love this Acer C720 even more than Samsung Chromebook. Why you ask? Well - the primary reason is the processor architecture. The Acer C720 is a traditional x86 processor, meaning you are able to easily boot alternative OSes on it.
This also means that under a Linux OS I am able to run applications like the latest Google Chrome browser, Google Hangouts (or Skype), Steam, and even Netflix.
I plan on writing a formal review of the C720, similar to the one I did for the Samsung Chromebook, later next month. Today however I would like to share how you can go about installing Bodhi Linux on the Acer C720 Chromebook.
Please note following these steps WILL permanently delete all local data and configurations of your ChromeOS!
Step 1 - Enable Developer Mode
Make sure your chromebook is off. Then hold the escape and refresh keys (where f3 should be) and power on the device. This should get you to a recovery screen - press ctrl+d followed by enter. The system should now reboot with developer mode enabled.
Step 2 - Enable SeaBIOS
After changing to developer mode, configure Chrome OS so that you can log in. To enable the legacy bios:
Open a crosh window with Ctrl+Alt+T.
Open a bash shell with the shell command.
Become superuser with sudo bash
Enable legacy boot with:
crossystem dev_boot_usb=1 dev_boot_legacy=1
Step 3 - Create a Bodhi image for the C720
While the C720 uses an x86 processor, some of the hardware it uses doesn't have drivers in the mainline Linux kernel yet. Because of this you need to download a custom ISO image I've prepared for the C720 from here. You then need to write it to a flash drive using the dd command.
Change to the directory where you have downloaded the ISO image to and run:
dd if=bodhi-c720-chromebook.iso of=/dev/sdX
Where X is replaced with the drive letter of your USB stick. If you prefer a GUI tool or are using OSX/Windows to create the flash drive you can find detailed information on this process here.
Step 4 - Boot and install Bodhi
Plug the USB stick you prepared in step 3 into your Chromebook. At the startup screen press the key combination ctrl+l (that is a lowercase "L") to tell the system to boot from the legacy BIOS. Then press the escape key to select to bring up the boot menu, select your USB device from the list it provides.
Notes
When your Chromebook starts up you will need to press ctrl+l to boot into the legacy BIOS/Bodhi. Still looking for a work around to remove this step - if you know of one please let me know!
When I installed Bodhi on my Chromebook I wiped out all the Chrome partitions and gave Bodhi the full drive. I've not experimented with a dual boot setup. I don't really have a need for ChromeOS with how functional Bodhi is on this hardware.
The custom ISO image for the C720 differs from the normal Bodhi desktop release in a few ways. First is that it utilizes the 3.11 Linux kernel with a few custom patches to support the C720 hardware. Second is that it utilizes pulseaudio for the default sound system as alsa has a few issues. It has slightly newer Intel/Mesa drivers to support OpenGLES on the C720 by default. Finally, it comes with a custom E profile that has key bindings for Chrome OS function keys configured.
A picture is worth a thousand words, so here is the default desktop you will see on your Bodhi Chromebook install:
Finally, if you have any issues getting Bodhi setup/installed on your Chromebook I would ask that you please open a support request on our user forums as opposed to simply pasting a comment below.
Something you may not know about Bodhi Linux is that we are 100% funded by user donations. We do not plaster our home page or user forums with ad content like so many distros do. We are very thankful to all of the folks that donate to keep our package servers running. Towards the tail end of 2011 we raffled off a Dell Netbook to a random person who donated at least five dollars during a set period of time.
This idea was very successful and since a couple of years have passed we are going to give away some more Bodhi powered hardware to a random donor. I'm quite fond of my Samsung Chromebook and I recently announced how well our Debian based operating system runs on this device today.
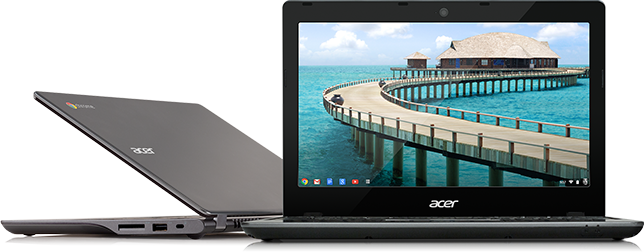
We are going to give away at least one of these little guys to someone who donates to the Bodhi project during the first quarter of 2014:
To have a chance to win one of these wonderful netbooks simply head over Bodhi's donation page and donate at least 5 USD. For every 5 USD you donate your name will be entered once into the raffle at the end of March.
I would just like to say thank you to the open source community. Your continued support has allowed us to become one of the longest lived Linux distributions that features the beautiful Enlightenment desktop by default.
If you could please share this post on your various social networks so our giveaway gets more exposure we would be very grateful!
For those who care, the full tech specs of the Chromebooks we are giving away:
The battery recently died in my old Asus Netbook which gave me some fire to finally get together a functional filesystem for the Samsung Chromebook I've had for a little over a year. I published a rough file system with install instructions here last December. Since then a few things have changed in the structure of ChromeOS and the install script/file systems needed some updates.
The following instructions install a Debian Wheezy based ARMHF file system with the Bodhi branded E17.6 desktop powered by the EFL 1.8.4
It is also worth noting that this updated installer script now supports installing the file system to an external media. When you run the second command in step three, simply provide an install target as the first argument (such as /dev/sda for a flash drive) and then press ctrl+u to boot tell the Chromebook to boot from an external media at start up. Please note following these steps WILL permanently delete all local data and configurations of your ChromeOS! It essentially restores the system to factory defaults.
Step 1 - Boot in Recovery Mode Make sure your chromebook is off. Then hold the escape and refresh keys (where f3 should be) and power on the device. This should get you to a recovery screen - press ctrl+d followed by enter. The system should now reboot into recovery mode.
Step 2 - Get to a TTY with Internet Once the system reboots in recovery mode it will take a few moments to get everything configured (this requires no user input, just waiting - so grab a snack). Once the system starts up select a wireless access point to connect to, but do not log into a Google account. Now that we have an internet connection you need to drop to a TTY. To do this press ctrl+alt+-> (The "->" key is where f2 would be on a standard keyboard).
For the username type chronos and then press enter - no password is needed.
Step 3 - Download and run Bodhi installer
From the tty run:
wget http://goo.gl/HFG6a
Followed by:
sudo bash HFG6a
Both of the above commands are case sensitive so make sure you type them correctly! After running the second command you will be provided with some information about your Chromebook - you should be asked if you want to install our stable or testing release.
At this point I would recommend using the Testing release because it offers fuller hardware support (such at 3D) and a newer Chromium version. I'd only recommend using the stable release if you need exactly Debian Wheezy as a base for some reason.
Step 4 - Choose how much space you are giving Bodhi
The installer will prompt you for how much space you want to give to Bodhi. Enter an integer amount for how many gigs you would like to give Bodhi. On the 16gig smartbook the most I would recommend giving to Bodhi is 9gigs (with the max being 10). For reference the base Bodhi install occupies around 1.6gigs. Once you select an amount of space to give Bodhi the drive will be re-partitioned automagically and then your system will restart. When it starts back up again you will need to walk through the ChromeOS setup process once more - again get as far as the Google login screen but do not log in.
Step 5 - Getting the Bodhi Filesystem
Get to a TTY again by following the instructions outlined in step 2 once more. Then run the same two commands provided in step 3. This time the Bodhi installer will see your drive has already been partitioned and it will begin downloading the Bodhi Chromebook image which it will then install. Note that this will take awhile depending on your internet connection speed as a 300MB tarball needs to be downloaded and extracted. After it finishes installing your system will reboot and you will be greeted by the Enlightenment desktop!
User Information Default username:
armhf
Default password:
bodhilinux
The default user has sudo rights.
Getting back to ChromeOS If you need to get back into ChromeOS after installing Bodhi on your Chromebook - don't worry it is still there. In a terminal client on Bodhi run:
sudo cgpt add -i 6 -P 0 -S 1 /dev/mmcblk0
Once you are done with ChromeOS you can run the following in the ChromeOS TTY to get back to Bodhi:
sudo cgpt add -i 6 -P 5 -S 1 /dev/mmcblk0
Notes
I am really happy with the state of this image. Audio works, screen backlight is functional, Chromium browser works, and Flashplayer works. Sadly opengles still escapes me, but I have no need to play games on my netbook.
Wrapping Up
As always, please do not post support requests here! Please direct them to the ARM section of our forums. I'd also like to say many thanks to Bodhi community member Seekamp for posting here about the many improvements he came across in the last year for Bodhi on the Chromebook.