Tuesday, March 18, 2014

Enlightenment Foundation Libraries Application Round Up

Most folks who have been around Linux and/or open source software for awhile are aware of what GTK and QT are - tool kits for building applications. Something that not as many may be aware of is that there is another open source tool kit out there - the Enlightenment Foundation Libraries. These serve as the building blocks not only for the Enlightenment desktop, but also for a growing number of applications.

Today I am going to provide a quick round up of applications written utilizing the Enlightenment Foundation Libraries.

System Tools -

Terminology brings "fun" back to the terminal while still being plenty practical. Supporting split panes and slew of other nice features it is stable and fast.


A simple, but functional, lightweight GUI front end for the Connman connection manager. Supports wired and wireless connections.


A simple graphical tool for the sudo command. Supports the same functions as similar tools such as gksudo. Also supports direct integration with other python EFL applications.


A tool for displaying information about the hardware in your computer. Supports exporting the formation collected to a text file.


eCcess provides a few different functions. It is a GUI for managing users on the current OS and assigning/removing group permissions. It can change the current date and time and finally it provides a simple task manager.


Similar to gDebi, eDeb allows the user to install Debian package files using a GUI.


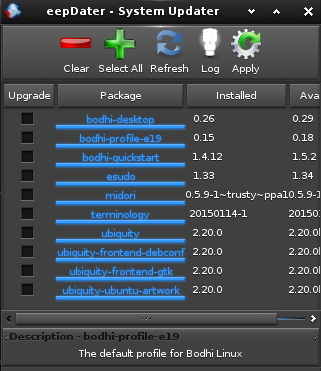
A tool for installing package updates on apt-get based systems.


Multimedia Applications - 


Utilities -


Games -


Escape from Booty Bay (Angry Birds Clone)


Wrapping Up -

Hopefully I've introduced you to some new wonderful applications today! Most of this software is fairly new though, so sadly many of them will not have packages in many Linux distribution's repositories. You can however find every application listed here in the Bodhi 3.0.0 repos (or you can add this repo to your Ubuntu 14.04 install).

If you know of an awesome EFL based application that I haven't included here today - please let us know what it is - and where to find it - in the comments below.

Cheers,
~Jeff Hoogland

Saturday, March 15, 2014

Introducing eepDater - GUI for Apt-Get Package Updates

One of the things I am working on for our Bodhi 3.0.0 release this summer is a simple GUI system update tool written in Elementary and the Enlightenment Foundation Libraries. Today I would like to share an early version of this tool I am calling eepDater (pronounced epp-date-er), which is written in python utilizing the EFLs.

eepDater provides a very simple, but functional, GUI for selecting which package updates you'd like to install on your computer via apt-get:


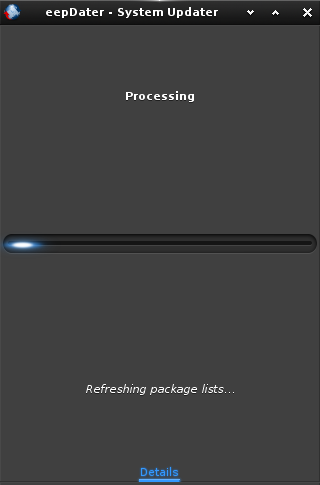
You can simply check the box for the updates you'd like to install and then hit the apply button. Hitting refresh will check for package updates:


One thing worth noting is that eepDater does not include any code for escalation of privileges for installing software. This means you should launch it with something such as eSudo.

If you are using at least Bodhi 3.0.0 you can install eepDater on your system with the command:

sudo apt-get install eepdater

For anyone else out there, you can find the eepDater source code on GitHub here.

Have any questions or suggestions feel free to drop them below! Keep in mind though this tool is intended to be simple by design.

~Jeff Hoogland

Friday, March 7, 2014

HOWTO: Add Bodhi's Enlightenment Desktop to Ubuntu 14.04

One question we often had users ask us in the past was if it was possible to convert an existing Ubuntu LTS install into Bodhi Linux. Previously the answer to this question had always been "No", but with our 3.0.0 release built on top of Ubuntu 14.04 we are finally looking to change this. The following is how you can add the latest Bodhi desktop to your existing Ubuntu 14.04 install.

Step 1: Add the Bodhi Repo to your Sources

Open a terminal and run:

sudo nano /etc/apt/sources.list

At the bottom of the file that is opened, add the line:

deb http://packages.bodhilinux.com/bodhi trusty main 

Step 2: Sync package lists

Next you will need to sync your package lists with the command:

sudo apt-get update

Step 3: Install the Bodhi Desktop

Install Bodhi's E19 Desktop with the command:

sudo apt-get install packagekit && sudo apt-get install bodhi-desktop

If you have an older computer or just prefer E17 you can install that instead with the command:

sudo apt-get install bodhi-desktop-e17

After this completes an "enlightenment" session should now be available in your login manager. 

Enjoy your new enlightenment powered Ubuntu!

~Jeff Hoogland

Tuesday, March 4, 2014

Buying Chromebooks for their Hardware, not their OS

I've kind of been on a Chromebook kick lately. Last month I posted a review of the Acer C720 I picked up recently, to summarize: I really love the device.

I think computers like Chromebooks are the way of the future, but not because of their operating system - because of their hardware. Relatively low cost laptops with SSDs for storage and an insane battery life are everything I want in a computer.

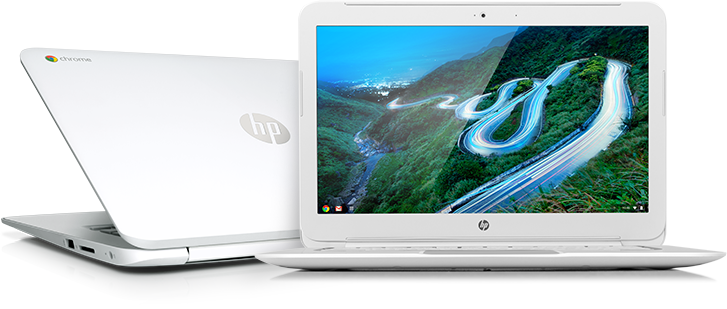
I liked the hardware specs of the Acer C720 so much, I've decided to replace not only my old netbook with a Chromebook - but I've replaced my primary work laptop with one as well. I picked up an HP 14" Chromebook this past weekend which has identical hardware specs to the Acer C720, while providing an even longer battery life:


Since I started posting about these laptops and my work with Bodhi Linux on them I've had piles of Linux users ask me why I am buying Chromebooks with the intent of running something other than ChromeOS on them.

This question is VERY hypocritical.

Some even go so far as to recommend "traditional" laptops that would have been a better choice. Guess what operating system these traditional laptops come with? You guessed it: Windows! Buying a Chromebook with the intent of installing a different Linux distribution on it is no different than purchasing a Windows laptop with the same intention.


Well, I guess it is a small bit different. You see - when I buy a Chromebook not only am I not paying a Windows tax for my hardware, but I am getting a laptop with a sleek form factor that gets an amazing battery life. To get these things from a Windows PC you generally have to pay a giant premium.

In closing, if you are in the market for some sleek Linux hardware at a low cost I would highly recommend checking out the Acer C720 or the HP 14" Chromebooks.

Cheers,
~Jeff Hoogland

Sunday, March 2, 2014

Bodhi Linux 3.0.0 Alpha Release

As promised I've put together our first Bodhi Linux disc that is built on top of the upcoming Ubuntu 14.04 release. Keep in mind this is a very early image not intended for production machines. There will be issues.

That being said, we are very interested in user feedback on our first couple pre-release discs for this version. Because we have a new major release we are trying a few different things that we want your input of. Features of note in this 3.0.0 alpha image that different from our Bodhi 2.x.y base:
  • Ubuntu 14.04 base
  • E19 pre-release replaces E17
  • No more manual profile/theme selection at start up
  • eConnman replaces nm-applet
  • Pulseaudio replaces alsa as the default audio system
  • Matrilineare replaces MaXo-Remix as the default icon set
  • LightDM replaces LXDM as the display manager
  • eSudo replaces gksudo
A few screenshots:

Login Screen


Default Desktop


Applications


The best place to give feedback regarding this release is in our 3.0.0 pre-release forum section. Let us know what you think about these changes or let us know if you have suggestions for improvement. For this first release I've only prepared a 32bit PAE enabled ISO image. Starting with our beta release next month we will provide a non-PAE, PAE and 64bit disc image like we do for all official releases.


Also - don't forget you still have until the end of this month to donate and be entered in our Chromebook raffle!

Cheers,
~Jeff Hoogland

Saturday, February 15, 2014

Improvements to Bodhi's Chromebook Support

Just a quick update to let folks know about a few updates our special installers for Bodhi Linux on Chromebook hardware.

Acer C720 Chromebook

I've updated the special ISO image for the Acer C720 which I give instructions for installing here. Updates to the disc include fully functional suspend, automatic audio switching over HDMI, and an E17 profile that enables all the function keys on the Chromebook to work as expected:


You will note in my screen shot above that there is also a bluetooth icon on the system tray. I've opted not to include this by default because I know many won't have a need for it. If you want to use the bluetooth on your C720 simply run the command:

sudo apt-get install blueman

And then use the GUI that is installed to connect to/interact with your blue tooth devices.

Samsung ARM Chromebook

Find instructions for installing Bodhi on the Samsung ARM Chromebook here. While I was busy implementing many improvements to the Debian Wheezy based ARM file system, one of our forum members had been working on a Debian Jessie based file system. Late last month he finished it up to essentially get the hardware fully functional under a true Linux OS! 

When you run our installer script you are now asked if you want to use the stable or testing release - I would highly recommend selecting the testing release at this point. It includes the same Chromebook specific profile I pictured above for the Acer as well as full OpenGLES support. 

The installer script now provides detection for a previous install on the target disc and over writes it (as opposed to making the user manually remove their old install). Another new feature of the installer is support for different install targets. Simply provide the install target as the first argument for the installer script and you can easily run Bodhi on your Samsung Chromebook from a USB flash drive or SD card.

HP 14 and Lenovo X131e

Also - nothing for these guys yet, but I am hoping to pick up an HP 14 sometime this week and get Bodhi going on it. Our same team member who did all of the wonderful improvements to the Jessie filesystem for the Samsung recently picked up a Lenovo X131e and has started work on dual booting this with Bodhi. I will post updates about these when we have something substantial to share.

Wrapping Up

As always, if you run into any issues please open a support request on our user forums as opposed to posting a comment below.

~Jeff Hoogland

Friday, February 14, 2014

HOWTO: Switch to HDMI audio out automatically on Linux

First things first, this is not a tutorial for getting your audio working over your HDMI if it isn't already. This assumes you already have audio over HDMI working via PulseAudio, but currently have to manually assign the new output after attaching your HDMI cable.

TL/DR

If you are using a Debian based distro and don't care about the details of how this works, then you can simply install the .deb file I've prepared here. After that finishes installing you should be good to go - attach your HDMI cable and the system should automatically switch from playing over the speakers/headphones to piping audio over the HDMI.

The Details or How we make things work on not Debian

How this works is a combination of PulseAudio, Bash, and a little bit of udev.

First things first, we need a bash script that with switch between PulseAudio outputs for us. Save the following bit of code to /usr/bin/hdmi_sound_toggle :

#!/bin/bash
#   Switches between soundcards when run. All streams are moved to the new default sound-card.

# $totalsc: Number of sound cards available
totalsc=$(pacmd "list-sinks" | grep card: | wc -l) # total of sound cards: $totalsc
if [ $totalsc -le 1 ]; then # Check whether there are actually multiple cards available
  exit
fi
# $scindex: The Pulseaudio index of the current default sound card
scindex=$(pacmd list-sinks | awk '$1 == "*" && $2 == "index:" {print $3}')
# $cards: A list of card Pulseaudio indexes
cards=$(pacmd list-sinks | sed 's|*||' | awk '$1 == "index:" {print $2}')
PICKNEXTCARD=1 # Is true when the previous card is default
count=0 # count of number of iterations
for CARD in $cards; do
  if [ $PICKNEXTCARD == 1 ]; then
# $nextsc: The pulseaudio index of the next sound card (to be switched to)
    nextsc=$CARD
    PICKNEXTCARD=0
# $nextind: The numerical index (1 to totalsc) of the next card
    nextind=$count
  fi
  if [ $CARD == $scindex ]; then # Choose the next card as default
    PICKNEXTCARD=1
  fi
  count=$((count+1))
done
pacmd "set-default-sink $nextsc" # switch default sound card to next

# $inputs: A list of currently playing inputs
inputs=$(pacmd list-sink-inputs | awk '$1 == "index:" {print $2}')
for INPUT in $inputs; do # Move all current inputs to the new default sound card
  pacmd move-sink-input $INPUT $nextsc
done
exit
Make our script executable with the command:

sudo chmod +x /usr/bin/hdmi_sound_toggle

Before moving on, confirm the script works as intended. While your HDMI cable is active run the command hdmi_sound_toggle and you should start hearing sound pipe out of the HDMI output.

Next, because PulseAudio is almost always run as a user level daemon, we need something that will move all users' Pulse sessions over to the new output when the HDMI is attached/detached. To do this we create the script /usr/bin/hdmi_sound_toggle_all with the contents:
#!/bin/bash

for dir in /home/*/
do
    dir=${dir%*/}
    sudo -u ${dir##*/} /usr/bin/hdmi_sound_toggle
done
Make this script executable as well:

sudo chmod +x /usr/bin/hdmi_sound_toggle_all

Confirm this script works as well, it needs to be run as root though, so run sudo hdmi_sound_toggle_all while your HDMI is attached - it should switch your output.

Finally, we need to create a udev rule that triggers our scripts when an HDMI cable is attached/detached. To do this we create the file /lib/udev/rules.d/hdmi_sound.rules with the contents:
SUBSYSTEM=="drm", ACTION=="change", RUN+="/usr/bin/hdmi_sound_toggle_all"
Note that having the full file path in the execute part is important. So if you placed your scripts somewhere other than /usr/bin like I recommended above - adjust this part accordingly.

You should be good to go, enjoy having audio over your HDMI happen automatically like it should by default. Have any questions, feel free to post a comment below and I'll do my best to help.

~Jeff Hoogland