Monday, December 23, 2013

AT&T Connect to Cell System Review

This is a post written by me on behalf of Advanced American Telephones. All opinions are 100% mine.

My wife and I moved into a new townhouse a few months ago and our current cell phone provider (T-Mobile) does not get the best service in our new home. We have found a few spots in the house that get reception, but the rest of it is a giant dead zone. The basement is absolutely out of the question for reception, which I believe is likely an issue for a lot of people.

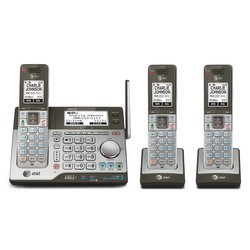
This past week we acquired a Connect to Cell System by AT&T (CLP99383) and so far we are very impressed with the results. The system is reminiscent of the average landline cordless telephone system but it integrates with cellular devices. Our system includes the main base, two additional charging bases, and three cordless handsets.

CLP99383

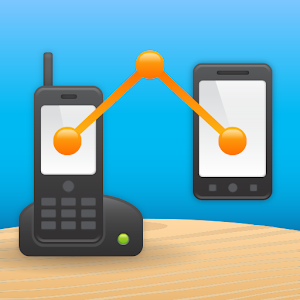
This system seems to have solved the biggest issue with our mobile devices - no service. The system uses bluetooth technology to connect the mobile device to the phone system. We simply have to leave our cell phones in a non-dead zone in the house and then we can use the handsets anywhere else in our home to send and receive calls using our mobile numbers/plans.

Ease of Setup: While my wife is by no means technology-illiterate, she had the system set up and working in just a few minutes without reading the instruction manual. The menus are intuitive and display on-screen instructions when connecting a device via bluetooth. The system supports being connected to up to two mobile devices at once (and a landline if anyone still has one of those).

Not Carrier/Device Exclusive: The system is AT&T branded, but worked with our T-Mobile devices and a friend's Verizon device seamlessly. Further, the system didn't have an issue working with my wife and friend's newer Android devices or my older Nokia N900. So long as your mobile supports a bluetooth headset it should work with the connect system.

Push to Talk Feature: The handsets and base are equipped with push to talk technology, creating an intercom system/walkie talkies for the house (It will be great not having to run up two flights of stairs to have a quick conversation).

Does not improve cell reception: The unit does not increase the reception that we receive in our house, so our phones still only work in certain areas, however the simple solution to this is that we have the base unit set up in an area where we do receive good reception and we leave our mobile devices next to it when we are home. The connect base even has a USB charging port built into it so our mobile doesn't run out of power while connected.

We then have the other units on the other two floors of the house. Leaving our mobile devices near the base ensures a good bluetooth connection (the instruction manual advises a 15ft. maximum distance)

Connect to Cell App: For Android devices, there is an app available in the Google PlayStore called "Connect to Cell." When used, the system will create an alert whenever your mobile device receives a text message, email, or social media update.


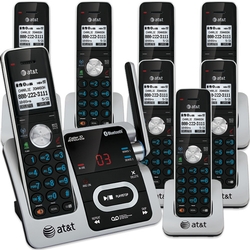
Additional Handsets: My home only has three floors, so I only have two extra handsets in addition to the base. If you have a need for more handsets than this the system supports connecting up to twelve at once.


Closing: Over all I am pretty happy with the Connect to Cell system. It allows me to have the feel of a traditional home phone system without having to pay for an additional service. It also provided a clean solution to having a lack of reception in certain areas of my house.


Cheers,
~Jeff Hoogland

Visit Sponsor's Site

Sunday, December 22, 2013

eAndora - Pandora Internet Radio Client - 1.0 Release

At the start of this year I posted about eAndora, a Pandora Internet Radio client I was working on that is written in Python and Elementary. Today I'm happy to announce that eAndora is finally feature complete enough for me to stamp something as a "1.0" release.

You will always be able to find the latest eAndora source release on source forge here. If developmental code is more your preference you can always find my latest work on github here.

I've tested this release with the latest releases of the Enlightenment Foundation Libraries (1.8.3), Elementary (1.8.2), and Python EFL (1.8.0). It could very well work with previous releases of these things though - for best results always use the latest versions.

Screenshot Tour:

Login Screen

Main Window

Station Creation

Station Selection

If you have any questions feel free to drop a comment below. If you are a Bodhi Linux user the eAndora 1.0 release is currently in our testing repository and will move into the stable branch in January once the EFL 1.8.x series makes its way to stable.

~Jeff Hoogland

Sunday, December 1, 2013

HOWTO: Watch Netflix on Bodhi Linux

Not being able to utilize the Netflix video streaming service has been an issue on the Linux desktop for the past few years. This is due to the fact that Netflix utilizes Microsoft's Silverlight technology for video playback.

For the last few months though we have been able to watch Netflix in our native browsers on Linux using a Wine pluggin wrapper called Pipelight. Today I would like to walk you through the short process of using Pipelight to watch Netflix under Bodhi Linux.

Step 1 - Install Chromium or Firefox

Pipelight needs Chromium or Firefox to work. So if you are still using Bodhi's default browser Midori - you will need to install one of these other two browser. You can obtain your browser of choice by clicking on one of the links below:


Step 2 - Install Pipelight

Next we need to install the Pipelight plugin by clicking on the link below:


Pipelight depends on the Microsoft corefonts package. This means that if you do not already have these fonts installed they will be installed as part of the installation of Pipelight. When installing these fonts you need to agree to an EULA, to navigate to the Accept button you will need to use the tab key, and then press the enter button to select it.

Step 3 - Setup a User Agent Changer

The User Agent is a little code in your browser that tells the page you are viewing what browser you are using. In order for Netflix to even offer us the Silverlight player it needs to think we are on Windows. To do this we install a user agent changer browser plugin. Install the proper plugin linked below for your browser:


After you have the user agent changer installed - set your browser to detect as "Windows Firefox".

Step 4 - Watch Netflix!


Step 5 (Optional) - Add Netflix to the Permanent Spoof List

If you are like me then you hate having to manually click a button and change your user agent string back and forth every time you visit the Netflix site. Thankfully the User Agent Switcher for Chromium as a "Permanent Spoof List". Simply add the URLs shown in the image below to identify as Windows Firefox 3.5 (note the * at the end of the URLs - it is important):


Enjoy! If you have any questions or issues feel free to drop a comment below or open a support request on the Bodhi user forums.

Cheers,
~Jeff Hoogland

Tuesday, November 26, 2013

HOWTO: Test E18, EFL 1.8.0, and Terminology 0.4.0 on Bodhi Linux

As of this past weekend the testing builds of the Enlightenment window manager DR18 (E18 for short) are in the Bodhi Linux testing repository. The following are the steps you need to take if you would like to install and help test the future of the Enlightenment desktop on your Bodhi Linux install.

Step 1 - Add the testing Repository

First we need to add the testing repository to our software sources. Open our sources.list with sudo using the following command:

gksudo leafpad /etc/apt/sources.list

Towards the bottom of the file you will find a line that reads:

deb http://packages.bodhilinux.com/bodhi precise stable

After the "stable" component we want to add the "testing" component. To do this we edit the above line to be:

deb http://packages.bodhilinux.com/bodhi precise stable testing

Save and close the file.

Step 2 - Upgrade to EFL 1.8.0

Open your terminal emulator of choice and run the following command:

sudo apt-get update && sudo apt-get dist-upgrade

This command will tell you that it wants to remove a number of packages (ecore edje eet eeze efreet eina eio embryo emotion eobj ethumb evas). This is fine - all of these packages have been merged into one "efl" package. Let the upgrade command complete.

Step 3 - Install E18

The default "enlightenment" package in Bodhi Linux will remain as the DR17 desktop - we will not be forcing anyone to upgrade to E18 so long as E17 still builds with the latest Enlightenment Foundation Libraries. This means to replace E17 with E18 we need to install the E18 package. In your favorite terminal run:

sudo apt-get install e18

It will tell you it wants to remove the "enlightenment" package - let it. After it finishes installing you should restart your desktop environment. 

Congrats, you now have the E18 desktop to play with!

A few Notes

I would like to remind everyone that this is pre-release software and you should expect to encounter issues. You can report/discuss the issues you are having in the testing section of the Bodhi forums.

At this current point a number of the extra modules (such as places and the engage dock) that the Bodhi profiles use are not currently built for E18. We will be working on adding support for these over the next few weeks.

In this same vein - a number of the existing E17 themes will have issues running under E18. They will all need updates to function with the latest version of the desktop. So when trying to confirm bugs it is always best that you are using the "default" E18 theme when testing things.

If you run into issues getting the testing repo added or the software installed I would encourage you to please open a thread on our user forums as opposed to simply posting a comment below. It is much easier to debug software issues on a forum than in a comments section.

Cheers,
~Jeff Hoogland

Thursday, September 12, 2013

Bodhi Linux 2.4.0 Released

It has been close to six months since our last Bodhi Linux release - far too long! This is just our normal update release - meaning if you are already a Bodhi user and have been running your system updates then you already have all these additions running on your system!

To cut right to the chase - you can find direct downloads of the ISO images on Source Forge here. You can obtain torrent downloads for the ISO images later today.

Before I talk about the small details of this release, I'd like to remind folks that Bodhi is moving to a three times/year update cycle as opposed to the previous four times/year updates we'd been doing. Since E17 stabilized we have less of a reason to power out ISO images as often. Expect new releases in January/June/September from now on.

Also - can you believe it is almost the end of 2013 already? That means Bodhi 3.0.0 is less than twelve months away! It will be out sometime in the summer after Ubuntu 14.04 releases.

Back to the here and now - our 2.4.0 release features three ISO images to install from:

  • 32bit featuring a current PAE enabled kernel
  • 32bit featuring a non-PAE kernel with older hardware support
  • 64bit featuring a current kernel
This release features the E17.4 desktop, version 0.5.5 of the Midori webrowser and the 3.8 Linux kernel. As always - our default theme selection is shaken up.


On a non-Bodhi related note, I'd like to apologize for the lack of new content on my blog for the last few months. Between moving, a new position at work, keeping my wonderful wife happy, and trekking all over the US for my hobby I haven't had nearly as much time to keep up with the latest technology. Hopefully I can find some time in the future to give my musings on things again.

~Jeff Hoogland

Thursday, June 6, 2013

Python - Sorting Lists inside of Lists

In some recent python code I was playing with I had the need to sort a bunch of lists based on elements within their elements. Thankfully python's built in sort function is plenty powerful and allows us to do this in a fairly easy manner. So for example if we have a list all of whose elements are also lists:

mylist = [["derp", 1, 7], ["bleh", 2, 0], ["merp", 0, 3]]

By default when we call the sort function on this list it will sort the sublists based on their first element in lexicographic order. For example:

mylist.sort()
print mylist
[['bleh', 2, 0], ['derp', 1, 7], ['merp', 0, 3]]

What if we don't want to sort these lists based on their first element though? By using the key argument we can sort our sublists based on any element we want. For example to sort the lists based on their second element we would use:

mylist.sort(key=lambda e: e[1])
print mylist
[['merp', 0, 3], ['derp', 1, 7], ['bleh', 2, 0]]

Or their third element:

mylist.sort(key=lambda e: e[2])
print mylist
[['bleh', 2, 0], ['merp', 0, 3], ['derp', 1, 7]]

Special thanks to the folks over at #python on freenode for helping me figure this little bit out. They are an extremely resourceful bunch. You can learn more about working with python lists here.

Cheers,
~Jeff Hoogland

Friday, May 31, 2013

Dated Hardware, Waiting for Hardware and the Nokia N900 in 2013

The Nokia N900 was released in November of 2009 - three and a half years ago. When I bought my first N900 in January of 2010 it was a huge upgrade for me in terms of both speed and software freedom (coming from a Blackberry). The idea of having a computer - a true computer - that was also a phone was amazing. The same device I used to send text messages, I also installed applications on using apt-get. True multitasking - my applications stayed open until I closed them, not until the operating system decided it wanted to kill them. I didn't mind paying the 450 USD it cost to purchase the brand new N900 out of contract - this was an awesome piece of technology!

Fast forward to 2013. Three years later I have gone through 2.5 Nokia N900s (I say 2.5, because the first two each broke in different ways and I was able to build a working device from their left overs) and still have it sitting on my desk as I write this. Three years is a long time in the world of mobile hardware and the N900 easily shows plenty of signs of aging. Compared to my wife's Nexus 4, it loads applications and web sites slowly.

So why is it I hold onto hardware/software that deserves an upgrade? Simple - no one has released a comparable replacement. At first I did not want to trade my true Linux operating system in for this dribble called Android everyone raves about. Upon giving Android a chance though - I could make do with it. The HTML5 supporting browsers on Andriod really provide a decent web experience (which beyond text messaging is what I mainly do on a mobile device).

The hold up then? The hardware. I'm not talking about the speed of the hardware though - I'm talking about the lack of design. Almost every modern mobile that is sold today is a pure touch device. Hardware keyboards are a thing of the past it seems.

Am I truly the last person left alive who doesn't like a software keyboard taking up half of my sub-10 inch screen while I type something?

When I search for modern cell phone hardware I certainly feel that way.

I have hope though! Within the next year we are expecting at least three new mobile operating systems to enter the landscape:
  • Ubuntu Mobile
  • Tizen
  • Firefox Mobile
I hope against all open that one of the hardware makers supporting these operating system breaks the current tread of touch-only devices. Maybe then I and stop picking up old N900s on Ebay when my existing one breaks!

~Jeff Hoogland

Monday, May 13, 2013

Samsung ARM Chromebook Review

The Samsung ARM Chromebook is one of a few ARM devices that I prepare Bodhi Linux images for. As such I've owned the hardware for almost six months now and during this time I've used it a fair amount. The goal of this post is to provide a comprehensive review of the product to see if it is something that could be useful to you.

Cost - 
Lets start with one of the first draws - the price point. The Chromebook comes in at under 300 USD. 250 USD plus shipping and handling to be exact.

Performance -
In terms of speed the Chromebook processor is snappy compared to other netbook offerings and ARM chipsets in general. The Chromebook sports the Samsung Exynos 5 1.7ghz dual core processor and 2gigs of DDR3 RAM. This coupled with the 16GB solid state hard drive allow the Chromebook to boot fully from a cold start in just a few seconds.

Under Chrome OS the Chromebook happily plays a variety of multimedia formats. Including 720p video files, 1080 flash streams, and Netflix.

Connections - 
In terms of "ports" the Chromebook sports two USB (one 3.0 and one 2.0), an SDHC card slot, HDMI video output, and a combination audio input/output jack. While all these ports are plenty functional I do have a few comments about them.

First - both USB ports, the HDMI and the power plug are all right next to each other on the back of the netbook. This means if you have all these ports in use at the same time space gets kind of tight (it also means if you have a clunky USB device it is going to block other ports).

Second - because the Chromebook has such little storage by default, it can be nice to use a SD card as extra space. Sadly, unlike most netbooks - when you insert a SD card into the Chromebook it does not go completely inside of the netbook. Meaning if you leave an SD card in the slot while transporting the netbook it is likely to get damaged.

Finally - maybe this one is just me, but I dislike not having traditional two ports for audio input/output. My traditional headsets do not work when using a Google hangout with this netbook.

Size & Feel - 
The Chromebook has an awesome form factor. Weighing in at just under 2.5 pound (about 1.1 KG) and having dimensions of 289.6 x 208.5 x 16.8 - 17.5 mm it is a sleek little device.

Personally I like Chicklet keyboards on laptops and the Chromebook keyboard is no exception for me. The keyboard layout on the Chromebook is one that is best described with an image though:


As you can see there is no super (or "Windows") modifier key, Capslock has been left off in favor of a "search" button, and while the top row of buttons may not read F1-F10 - under non-ChromeOS operating systems they return these values.

One design choice I found slightly odd with the Chromebook is that even though the hardware supports a "right" click function, all context menus within Chrome OS are called up with a two finger touch ("right" clicking in Chrome OS is no different than any other single finger touch).

Battery & Screen - 
The battery life on the Chromebook is one of the largest draws I think. It is easily one of the lightest pieces of hardware with a lengthy battery life. Through average web use the Chromebook sees just shy of seven hours of usage before you need to find an outlet.

While the screen resolution could be better, the Chromebook's 1366x768 screen resolution at least enables you to watch 720p video in their native quality.

Misc Thoughts -
I have had some trouble using the HDMI output on the Chromebook - the graphics drivers on Chrome OS seem to be fairly buggy. I've experience full system lock ups when attaching an external screen while the OS is running - but this does not happen every time and I cannot reproduce it consistently.

One that keeps me from using the Chromebook as my primary mobile computer over my old trusty Asus T101MT is that Dropbox does not create their software for ChromeOS or generic ARM Linux devices to date. I store a lot of data on this service and accessing it all via a web portal instead of having it sync to the system's local drive is very annoying. If you are open to using Google drive this is a non-issue, but I haven't had the time to make this jump as of yet.

Closing -
Who would I recommend the Chromebook to? Anyone who needs a device for accessing the web, but requires a keyboard to get their work done. If a large deal of your computing time is spent on Gmail, Facebook, Netflix, online shopping or Youtube then the Chromebook is the perfect device for you.

Who would I not recommend a Chromebook to? Someone that is looking to use it as their sole computer. While a lot of people use the web a lot - most people still have at least one or two desktop applications they need access to (such as my tie to drop box). Because of this Chrome OS's "web based" application eco-system currently still leaves some to be desired.

Do you own a Samsung ARM Chromebook? If so what are you thoughts on the device?

Cheers,
~Jeff Hoogland

Sunday, March 31, 2013

Bodhi Linux 2.3.0 Released

After almost exactly three months since our Bodhi 2.2.0 release the Bodhi team and I are happy to announce the next update release for our 2.x.y series - Bodhi Linux 2.3.0. Again because this is a minor update release people who are already using our 2.x.y branch can simply upgrade to this release via their package manager. Something else I would like to mention is that next month our 1.x.y series release will be reaching its end of life next month (meaning our repos for it will be fully shutdown) so this is a great time to upgrade to our matured 2.x.y release if you've been waiting.

For those who don't care to hear my ramblings, you can find direct download links for our ISO images on Source Forge here and then torrent downloads for the ISO images here (please help seed for a few days if you can).

As with our 2.2.0 release there are three disc downloads for this version:

  • 32bit featuring a current PAE enabled kernel
  • 32bit featuring a non-PAE kernel with older hardware support
  • 64bit featuring a current kernel
Software wise we see the following updates with this release:
And of course there are a number of other application updates in the Bodhi repos (not included by default) such as Firefox 19.0.2, Chromium 25, nVidia 310 drivers and LibreOffice 4.0.1

Of course we have some fresh looks for this Bodhi release in terms of art as well! You will find the following default themes on this Bodhi disc:

Angelic


Miguel


Egypt


Vision


Bodhi Forum


Finally - please do not comment on this post asking for help with an issue you have with Bodhi. Instead open a support request on our user forums.

Cheers,
~Jeff Hoogland

Wednesday, March 20, 2013

Mir, Wayland and the Future of Bodhi Linux


Things have been a little quiet around my blog of the late. At the beginning of last month I started a full time position doing some IT related tasks for a major insurance company where I live in central IL. Between the new job, playing Magic, spending time keeping Bodhi things up to date, and preparing to get married in less than a month - I haven’t had time to post as much as I’d like to on here.

Today I would like to take a moment to discuss a topic that has received much attention on Linux blogs/news sites in recent weeks – Ubuntu’s concept for the Mir display server. I would like to start by pointing out I’ve said the concept of Mir. That is right folks – at this point it is just a concept, nothing more. Not long ago Ubuntu announced they’d be moving to Wayland. We all know exactly how much came from this announcement. Because of this history I’m going to reserve my judgment of Mir until we see it actually created and put into use.

Lots of people have been jumping to even more conclusions as to what exactly Mir means for derivatives of Ubuntu – such as the Bodhi project I manage. Currently Mir means absolutely nothing for Bodhi. We intend to continue following our close relationship with the upstream Enlightenment developers (we are after all an E-centric distro) and at this current point in time the Enlightenment team has zero plans to support Mir (which is fine, because again it is still nothing more than a concept). The E team however has been actively working on porting the EFLs/E desktop to be functional on top of Wayland.

Does this mean Bodhi will move to using Wayland for our display server? No it does not. Does Ubuntu moving to Mir (some year[s] from now) mean Bodhi will be rebased on another Linux distribution (such as Debian)? No it does not. Bodhi uses Enlightenment for it’s desktop because I believe it is the best desktop Linux has to offer. As long as X11 remains the best display server Linux has to offer Bodhi will continue using it. As long as Ubuntu remains the best/most supported core to build a distribution off of Bodhi will remain being derived from it.

That being said, our next major Bodhi release (3.0.0) will not be released until summer of 2014. A lot can happen in terms of software (and technology in general) over the course of 15 months – so nothing is set in stone. When it comes time for our next major release we will be re-evaluating all aspects of our project to ensure we are choosing technologies that are the best for our end users. After all, what good is an operating system if it doesn’t serve it’s end users well.

Speaking of Bodhi releases – keep an eye on our testing forum for Bodhi 2.3.0 pre-release discs within the next twenty-four hours. That update release is scheduled to be out by the end of this month.

Cheers,
~Jeff Hoogland

Tuesday, February 26, 2013

A Fat Stack of Bodhi Linux

When I first started preparing Bodhi ISO images almost two and a half years ago I set out with the goal of providing a clutter free operating system powered by the latest Enlightenment desktop. We call what we do "minimalist" meaning it doesn't come with a whole lot by default. This ideology isn't for everyone, though. Thankfully, the power of choice is something that greatly empowers free software development.

Today, I would like to offer a bit more choice for Bodhi users. I would like to share with you all my "friends and family" version of Bodhi Linux. You can grab the ISO image for this fat stack of Bodhi on source forge here. I call it my "friends and family" disc because when I am pressed for time I can't always sit down and install all the extra software "normal" people need to use their PC. This image allows me to skip the installing software step after I install the operating system.

This ISO image is something I've been working on and using as an install media for my non-personal systems for awhile now and I think it is finally in a state that I am happy sharing it. It is simply a Bodhi 2.x branch live/install CD powered by a Linux 3.5 kernel and the latest E17.1 Enlightenment desktop. It comes with a bunch of software pre-installed that should keep most people happy:


This is a 32bit disc image and no I will not be preparing a similar 64bit disc. I intend this disc for home systems, for which I recommend 32bit operating systems. Users installing from this disc can get support on the Bodhi Forums just as if they had installed from the normal disc.

~Jeff Hoogland

Saturday, February 16, 2013

Comparison of Linux Desktops OpenGL Performance

With Steam officially being released for Linux I took some time out this evening to run a few benchmarks on my Ubuntu 12.04 based Bodhi system to see how a few of the different modern Linux desktops compare in terms of OpenGL performance with the source engine. Please do not take my numbers to be anything super scientific or precise. I simply recorded a short demo using Team Fortress 2, loaded TF2 from Steam under each of the Linux desktops with no other background applications running and ran the demo through a built in source engine bench marking tool.

The benchmarks were run on my very modest gaming laptop which sports an i7 processor, 6GB of RAM, and an nVidia 330m GT graphics card. I utilized the Steam recommended nVidia 310 driver for these tests. All the desktop setups I used were "stock" from the Ubuntu 12.04 repos, minus E17 which is using the E17.1 snapshot and Bodhi's laptop profile with compositing enabled.

Lets get right to the data shall we? You all love charts I hope!


It is clear from the bar graph that E17 came out towards the top and Gnome Shell was near the bottom. Here are the numbers to a single decimal place:
  • Gnome Shell - 51.5 FPS
  • KDE   - 55.0 FPS
  • XFCE - 55.7 FPS
  • Unity  - 60.5 FPS
  • KDE, Disable Compositing on Full Screen - 63.2 FPS
  • LXDE - 66.5 FPS
  • E17     - 66.7 FPS
I was not surprised when I saw E17 and LXDE had the best performance, they are after all some of the best light desktops today. What did shock me though was that XFCE - which claims to be fairly light - was very low in terms of performance! 

Based on the above numbers XFCE performed around 17% slower than both LXDE and E17, while Unity was around 9% slower than the lighter desktops, and Gnome Shell was a staggering 23% behind.  One other thing worth noting is that KDE has a HUGE performance difference when you check the "disable compositing on full screen applications" box in your Kwin settings. In fact ignoring this setting loses you around 13% in performance:


Obviously someone should run some further tests (I know I plan to when I get some more time), but from my initial small test it is obvious - if you are looking to game on Linux your choice of desktop very clearly matters!

~Jeff Hoogland

Friday, February 1, 2013

Tutorial 2: ELM Images, File Selector and Popups

This is the second post in my series on developing GUI applications in Elementary using Python. Today we are going to continue building on the Hello Elementary example I started in the first tutorial. In today's post I will only be covering the code that is different from our previous examples, so if you haven't looked that one over yet please take a moment to do so now.

You can find the full source code for all of today's examples here.

Example 3:
We are going to start off by displaying a static, pre-defined image in our GUI:


It only takes us 8 lines of actual code to create and display the above image in our program:

    #Creates an Image object that displays an image
    ic = elementary.Image(window)

    #Use the os module to get the current path to our .py file. Our image is relative to our .py We do this because it is best to use the absolute file path to images for the best results.
    location = os.path.dirname(os.path.abspath(__file__))

    #Tell our icon to auto-fill open space
    ic.size_hint_weight_set(evas.EVAS_HINT_EXPAND, evas.EVAS_HINT_EXPAND)
    ic.size_hint_align_set(evas.EVAS_HINT_FILL, evas.EVAS_HINT_FILL)

    #Here we set the image we want our icon to display
    ic.file_set("%s/images/logo.png"%location)

    #Optional, lets add mouse over text to our image
    ic.tooltip_text_set("Look a pretty picture!")

    #Lets show our icon
    ic.show()

    box.pack_end(windytax)
    #Pack our icon between our text and button
    box.pack_end(ic)
    box.pack_end(button)

In this example we utilize the elementary Image object to display our selected .png file.

Example 4:
Very rarely do we want to simply display a single image for as long as our program is running. So lets give the user the ability to change the image we display in our program:


Elementary has a built in FileselectorButton object that when clicked presents our user with a nice file selector GUI:


The new code to add this file selector button looks like:

    #Creates a "FileselectorButton" object. This is a button (just like we have created before) except that when it is click it automatically opens a file selector window
    fsb = elementary.FileselectorButton(window)

    #We can set the text of our fsb just like a normal button text
    fsb.text = "Change Image"

    #Tooltip for mouse over
    fsb.tooltip_text_set("Click Me!")

    #This tells our file selector window what to do when our user selects a file. The first argument is the callback function we want run and our second argument is our image object we want to change the display of
    fsb.callback_file_chosen_add(change_image, ic)

    #Show our button
    fsb.show()

    box.pack_end(windytax)
    box.pack_end(ic)
    #Pack our file selector button between our image and button
    box.pack_end(fsb)
    box.pack_end(button)

    window.resize_object_add(box)

    window.resize(300,300)

    window.show()

#Our fileselector callback. The file argument is the fileselectbutton object. The second argument is the full path to the file that was selected. The final argument is the image object we passed to this callback
def change_image(fsb, file_selected, image):
    #Check to make sure a file of some sort was selected. If nothing was selected file_selected will equal None type
    if file_selected:
        #These are the extensions we will allow our program to display
        validExtensions = [".png", ".jpg", ".gif"]

        #Use the os module to easily get the extension of our file
        fileName, fileExtension = os.path.splitext(file_selected)

        #If the extension is in our validExtenions lets check the image we are displaying!
        if fileExtension in validExtensions:
            image.file_set(file_selected)

Example 5:
Lets add one finishing touch to our application. If our user selects a file to display that doesn't have a valid image extension lets send them a popup telling them why the image displayed wasn't changed:


Showing a popup of this nature is fairly easy using elementary's Popup object. So the final edit to our code looks like this:

#This time we also pass the window object to our change image function. The reason for this is that our popup object needs a parent window object
def change_image(fsb, file_selected, image, window):
    if file_selected:
        validExtensions = [".png", ".jpg", ".gif"]

        fileName, fileExtension = os.path.splitext(file_selected)

        if fileExtension in validExtensions:
            image.file_set(file_selected)
        else:
            #if we have an invalid extension lets give the user a popup message telling them why the image didn't change

            #Create a popup message
            popup = elementary.Popup(window)

            #Set the title of our popup
            popup.part_text_set("title,text", "Invalid File Extension")

            #Set the text of our popup
            popup.text = "File %s has an invalid file extension of %s"%(fileName, fileExtension)

            #Create a button object
            bt = elementary.Button(window)

            #Set it's text
            bt.text = "OK"

            #Define a callback that is called when the button is clicked, lets pass our popup object to this call back so we can close the popup when the user presses OK
            bt.callback_clicked_add(bnt_close, popup)

            #Sets content for our popup. The first argument is an arbitrary name for the content piece and the second argument is the elementary object you would like displayed for the content
            popup.part_content_set("button1", bt)

            #Show the popup to our user
            popup.show()

#The callback for our popup's OK button. The first agurment is the button object itself and the second object is the popup we passed to it
def bnt_close(bt, popup):
    #Lets delete the popup so it goes away
    popup.delete()

Hope everyone learned something today! Have any questions feel free to drop a comment below or start a discussion on our user boards.

Resources for this Lesson:
~Jeff Hoogland

Thursday, January 31, 2013

New E17 Stable Snapshot and the First of E18

You read that title right folks. The first showing of Enlightenment DR18 (or E18 for short) has become a reality. Sure, it is nowhere near what the final product is going to look like - but it is a start. If you would like to follow the life cycle of E18 as it develops there is a new release manager blog that can be found here.


For those who like to stay on the more "stable" side of things also new today is a bug fix snapshot for the E17 stable release - dubbed 0.17.1. If you are a Bodhi Linux user you will find the "enlightenment" package in the Bodhi testing repo is already at version 0.17.1. These packages should make their way into our stable repo some time in the next week.

You can find downloads for both of these snapshots here.

~Jeff Hoogland

Tuesday, January 29, 2013

Tutorial 1: Hello Elementary

This post is the first in a series I am going to be publishing about using elementary and python to develop applications. The source code for all of the examples I am providing can be found in a GitHub repository here. Looking to get help with development? - We have started a programming focused section of the Bodhi Linux forums here. Other great resources for getting help are the Enlightenment devel mailing list as well as #e on freenode IRC. I've also added the python elementary API documentation to the Bodhi website here.

Example 1:
Since most people (myself included) learn best through examples, let's dive right into the code. To start, we are going to be creating a simple window that displays some text to us. It will look something like this:


Including my comments explaining what each line of code does, it takes us less than 50 lines of code to get the above window on our screen. Let's take a look (you can also find the source code for this lesson here):

#Import the elementary library so we can use it
import elementary

#Import evas, used for resizing things
import evas

#A function that creates and shows an elementary window
def hello_elementary():
    #Creates a "Standard" elementary window. The first argument is the name of our window. The second argument is the title displayed on the window bar
    window = elementary.StandardWindow("hello world", "Hello Elementary")

    #callback_delete_request_add tells our window what to do when it's "close" button is pressed
    window.callback_delete_request_add(lambda o: elementary.exit())

    #Content for our window. Creates a "Label" object which display text in our window. Whenever we create an elementary object we must provide a parent window as input
    windytax = elementary.Label(window)

    #Tells our label object to change size based on the size of our window
    windytax.size_hint_weight_set(evas.EVAS_HINT_EXPAND, evas.EVAS_HINT_EXPAND)
    windytax.size_hint_align_set(evas.EVAS_HINT_FILL, evas.EVAS_HINT_FILL)

    #Define what text our window should display
    windytax.text = 'Hello Elementary!'

    #If we want to see our object we need to tell it to be shown
    windytax.show()

    #resize_object_add adds our Label object "windytax" to the window
    window.resize_object_add(windytax)

    #resize takes an ordered pair as input for the size for our window, the dimenions are pixel by pixel
    window.resize(300,300)

    #Finally lets tell our window object to show up just like we did with our label
    window.show()

#Runs when our script is run
if __name__ == "__main__":
    #Runs our function which creates our window
    hello_elementary()

    #Starts an elementary event loop which displays all elementary objects we've created. Our code stays at this point until elementary.exit() is called
    elementary.run()

    #Once elementary is done running lets shut everything off to finish the application
    elementary.shutdown()

In this example we create two elementary objects: A StandardWindow and a Label. The StandardWindow as you can guess is the window we are creating, while the Label is a child object that we add to our window to display.

Example 2:
We want our application to do much more than just display text (most of the time). So let's go ahead and add a couple more objects to our Hello Elementary application. Let's add a button that closes our application:


The full code for this application can be found here. I will now highlight what is different from our previous example.

def hello_elementary():
    ...

    #Create an elementary button object
    button = elementary.Button(window)

    #Set some text for our button
    button.text = "Goodbye Elementary"

    #callback_pressed_add tells our button a callback to run when our button is pressed, the first argument is the function run and the following arguments are things to pass to the callback
    button.callback_pressed_add(button_pressed, "argument1", "argument2")

    #Show our button
    button.show()

    #Since we now have multiple objects we want to display on our window, we can position these objects using an elementary box which is a container object that you can "pack" items into.

    #Create a box
    box = elementary.Box(window)

    #Tell our box to fill all open space in our window
    box.size_hint_weight_set(evas.EVAS_HINT_EXPAND, evas.EVAS_HINT_EXPAND)
    box.size_hint_align_set(evas.EVAS_HINT_FILL, evas.EVAS_HINT_FILL)
    
    #Show our box
    box.show()

    #Lets pack our label and then button into our box!
    box.pack_end(windytax)
    box.pack_end(button)

    #This time lets use our box  instead of just our label
    window.resize_object_add(box)

#Our callback when the button is pressed. The first argument for this function will be the elementary button object. The rest of the arguments are the custom things we passed above
def button_pressed(button, arg1, arg2):
    #Show the content of our arguments in terminal
    print arg1, arg2

    #Lets have our button close the application, so run:
    elementary.exit()

Example 2 adds two more elementary objects to our application - a Box and a Button. A Box is an elementary object that we use to hold other elementary objects to they are positioned how we want them inside our application window. You "pack" items into a box that is either vertical (default) or horizontal. A Button is an object that can have text and/or images displayed on it that can fire a callback when pressed.

Resources for this Lesson:
~Jeff Hoogland

Monday, January 28, 2013

Bodhi on MK802 and other ARM Updates

MK802:

Today I am happy to announce our first public Bodhi images for the MK802 Android stick:


This image comes with a 3.0 kernel and it has OpenGL support for MK802 GPU enabled out of the box. You can find a download link for the MK802 on the ARMHF page of the Bodhi website. The default user name is armhf and the password is bodhilinux. This default user has sudo enabled for installing software and ssh is on by default.

To use this release simply DD the provided .img file to a micro SD card, insert it into your MK802 and power it up. This image has a 1080p script.bin by default, meaning if you are trying to use this image on a screen that only supports 720p resolution you will need to replace the script.bin on the first partition of the image with the one found here.

Since this is our first image for this ARM chipset I have no doubt that it will contain some rough edges. For certain the MK802's built in wireless and OpenGL are functional on this image - I haven't had time to test the audio yet though. Alpha quality release of course.

Please, please, please do not make a comment on this post asking for support with an issue you encounter with installing/running Bodhi on your MK802! Comments asking for support will be removed from this post. Instead please open a support request thread in the A10 section of our user forums. It is much easier to manage/search/solve issues in a message board format than a comments section.

Other Updates:

This past weekend I've also published image updates for our Raspberry Pi and Genesi Smartbook images. Like this image they now both include EFL 1.7.5 and E17 stable by default.

Cheers,
~Jeff Hoogland

Tuesday, January 15, 2013

Some Yummy Elementary Applications

For those who aren't aware Elementary is the top level building block for the Enlightenment Foundation Libraries (EFL). The EFLs reached their first stable release almost a year ago, but aside from E17 there haven't been very many applications written using these libraries to date. Today I would like to highlight a few applications that are being developed using Python and Elementary that have reached a usable state.

Epour - Torrent Client:


Epour uses libtorrent as a back end and currently supports all the basic features you need for a functional torrent client. You can pause/resume torrents and it resumes a partially finished torrent just fine. Epour is currently being developed by Kai Huuhko.

eCcess - System Tool:


eCcess is intended to be a desktop neutral GUI for managing various system tasks. It is still very much a work in progress, but currently it allows you to:

  • Create users
  • Delete users
  • Change a user's password
  • Change the current time
  • Change the current timezone
There is a small screenshot gallery here. I am currently the driving force behind eCcess and I am very much open to ideas for what features it should include in the future.


Valosoitin is a audio player with a very simple playlist interface. Supports all audio formats supported by either Xine or GStreamer. Valosoitin is also being developed by Kai Huuhko.


I already mentioned eAndora a couple of weeks ago, but I figured as long as I was talking about Elementary applications I would bring it up again. Since my first post it has gained a few new features. It now remembers the last station you had playing when you close/relaunch the program and you can now "like" and "ban" songs from your stations. I also improved some back end things so the application is more stable and times out far less with extended play.

Getting these applications:

If you are currently a Bodhi Linux user all of the above applications are just an apt-get away. If you are using a different operating system just make sure you have the latest EFLs installed along with their Python Bindings and then check out the source code from the links I provided above. 

Working with these libraries myself has been a lot of fun. I hope in the future we will see more application development using Elementary as it is a very powerful/flexible library.

Cheers,
~Jeff Hoogland

Wednesday, January 9, 2013

Nexus 7 jams with Bodhi Linux

After a few weeks of working on other things I've gotten back around to doing some more work on our Bodhi for Nexus 7 image. I've just uploaded a new Bodhi rootfs.img (which can be gotten from our source forge page here). This image brings a few improvements, most notably:

  • Menu/Buttons have been made slightly larger to make things more "finger friendly"
  • Suspend now works and pressing the "power" button on the device now suspends Bodhi by default
  • Audio now works without any tweaking
  • Stable E17 packages
My TODO list for the device still includes determining why OpenGL seems to not want to work as well as creating a automated installer script for loading Bodhi on to your Nexus 7. For now this updated image can be installed following the method I laid out here. If you encounter any issues with this image please open a support request in the Nexus 7 section of our user forums.

I'm going to be busy jamming to eAndora on my Nexus for awhile:


Cheers,
~Jeff Hoogland

Thursday, January 3, 2013

Bodhi Linux 2.2.0 Released

The Bodhi Team and I are very happy to present to you our 2.2.0 release - the first Bodhi images to feature the stable E17 desktop. As with all minor Bodhi release existing users can simply upgrade their existing installs of Bodhi 2.x.y This release is exciting for a number of reasons. To start with, we are introducing a few new things with this update release.

With this release, we will now be maintaining two 32bit install discs: One that is PAE enabled by default and one that is not. The kernel without PAE will be an older stable kernel (in this case 3.2) while the PAE enabled kernel will be the latest kernel - for 2.2.0 this means 3.7 kernel. Our 64bit release also comes with the 3.7 kernel.

These discs are also our first released images that are hybrid ISO images. This means that you can write the image directly to a flash drive simply using the dd command and it will become a bootable media. You no longer need to use unetbootin (unless you want to) to create bootable Bodhi flash drives. Remember, we also sell branded Bodhi flash drives to help support the project (we are supported 100% by user donations).

Also included in these disc images are local copies of our newly updated Bodhi QuickStart and the Bodhi Guide to Enlightenment. Both of these documents have been updated to reflect all of the recent changes that have occurred with the stable E17 release.

Bodhi 2.2.0 also features some fresh updates to every one of our default profiles:

Bare:


Compositing:


Desktop:


Fancy:


Laptop:


Tablet:


Tiling:


In addition to the wonderful new E17 default theme featured in each of the profile screenshots above, Bodhi 2.2.0 ships with the following elegant themes by default:


If you are not happy with any of the default theme selections (or are just looking for some more variety) check out our complete theme page here.

You can find download links to our 2.2.0 discs on the downloads pages at BodhiLinux.com or you can find direct links to the ISO images on our sourceforge page here.

Finally - please do not comment on this post asking for help with an issue you have with Bodhi. Instead open a support request on our user forums.

Cheers,
~Jeff Hoogland

Wednesday, January 2, 2013

Bodhi is ARMing up for a new Year

The mainline Bodhi desktop repositories recently received the gift of stable E17 packages and this same present isn't far off for our ARMHF branch. In the mean time however I have prepared and shared new ARMHF images for the Raspberry PI and Samsung Chromebook.


For the Raspberry PI image, in addition to sporting the shiny new E17 packages - it now comes with the much requested WICD network manager by default. This means those of you using your Raspberry PIs with wireless devices will now have a GUI by default to configure/connect with this interface. You can find this new Raspberry PI image on our downloads page.


The Chromebook release is a bit more exciting. This image has audio working by default and the track pad functions much smoother - including two finger tap to simulate a right click. To get this latest images you follow the exact same install instructions I outlined here a couple weeks ago. For existing Bodhi-for-Chromebook users you can fix your audio by following this guide and improve the trackpad by following this one. One other thing worth noting is that the Chromebook automated installer now includes a md5sum check - so it will only complete the install if your download is valid.

I haven't forgotten about our Nexus 7 users - an update for you will be coming later this month as well.

~Jeff Hoogland

Tuesday, January 1, 2013

Introducing eAndora - Pandora Client

A good deal of the work I do with the Bodhi project is packaging software/releases and managing things. One of my goals for this new year is to spend some time doing some actual development work with the Enlightenment Foundation Libraries and, more specifically, Elementary. I have a good bit of background with python programming, so my first leap into this field is writing a few small GUI applications in python and elementary.

I finally have enough work done on one of these projects that I feel OK sharing my work with the world. Today I would like to share with you a very, very early release of an application I am calling eAndora:


eAndora is a front end for Pandora Internet Radio. I've started a git repository here that I will be publishing updates to as I write them. The interface is still very basic, but the player is completely functional in the aspect that it allows you to browse and play your Pandora stations and skip tracks you don't like. In addition to being developed with Elementary, eAndora differs from projects like Pithos in the fact that it uses VLC as a streaming back end as opposed to the more common gstreamer.

Here are a few screen shots of the first draft of the GUI:

Login Screen:


Main Window:


Station Select:


I've packaged eAndora for Bodhi Linux and users can get it via a simple:

sudo apt-get install eandora

This package includes a launcher that is placed in your Audio menu.

Folks on other operating systems will need at least EFL 1.7.3, version 1.7.0 of the python EFL bindings and VLC 2.0.  Once you have all these installed simply clone the git repo and launch eAndora with:

python eAndora.py 

Please feel free to let me know any issues you find with eAndora by dropping a comment on this post. Do not however report a lack of functionality as an issue - there is still a good deal of work that needs to be done on this project - I just believe in sharing early and often.

Cheers,
~Jeff Hoogland